This is where most bad purchases happen. Both plates above are 257×257 mm, sized for Bambu's 256×256 mm machines. Bambu's other printers use different plate sizes, and a 257 mm plate physically will not work on them.
Best Build Plates and Bed Adhesion for Bambu Lab (2026)
Aftermarket PEI plates cost roughly half of the originals, and a spare plate means swapping instead of waiting. Here are the picks, with exact size compatibility per printer.
Last updated:
Affiliate disclosure. This page contains affiliate links. If you buy through them we earn a small commission at no extra cost to you. We have not lab-tested every plate on this page; picks are based on manufacturer specifications and broad community consensus, framed as such below.
Quick answer
Best textured PEI: BIQU PyroGrip 257×257 (~$20). Same mount as the original, about half the price; keep one as a swap spare. Most versatile: UniTak3D Double-Sided PEI 257×257 (~$25), smooth on one side and textured on the other, so you get two surfaces in one plate; the manufacturer also lists A1 compatibility. Adhesion helper: TEQStone Bed Adhesive (~$18), better than a plain glue stick for PETG and engineering materials. Size warning: both plates are 257×257 mm and only fit the 256 mm machines (P1P, P1S, P2S, X1C, X1E, X2D, A1). They do not fit the A1 Mini, A2L, or H-series. Full table below.
Top pick
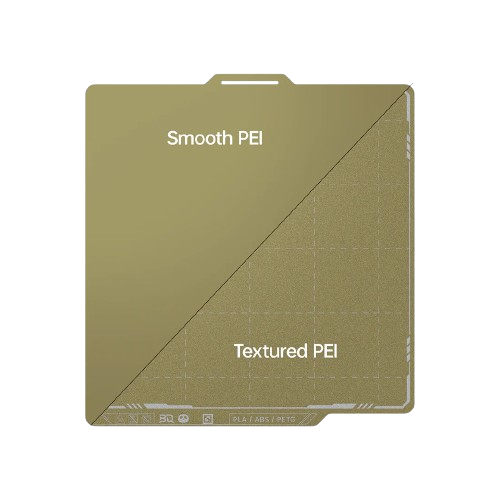
BIQU PyroGrip PEI Plate
~$20Third-party textured PEI, 257×257 mm. Same mount as the stock plate at about half the price. Get a spare so you can swap plates and keep printing instead of waiting for a print to cool.
Amazon →
Most versatile
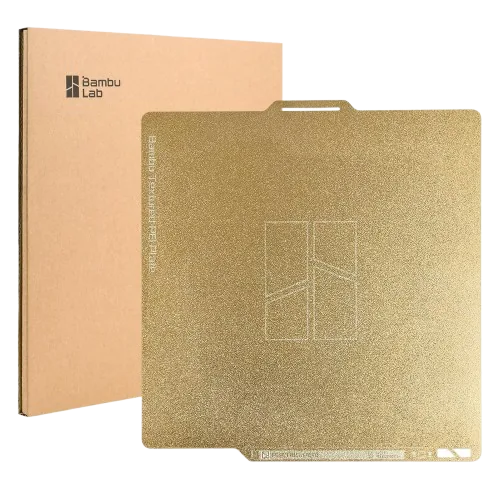
UniTak3D Double-Sided PEI
~$25Smooth one side, textured the other: two surfaces in one 257×257 mm plate. Textured for grip and a matte bottom, smooth for a glossy bottom finish on display pieces.
Amazon →
Adhesion helper
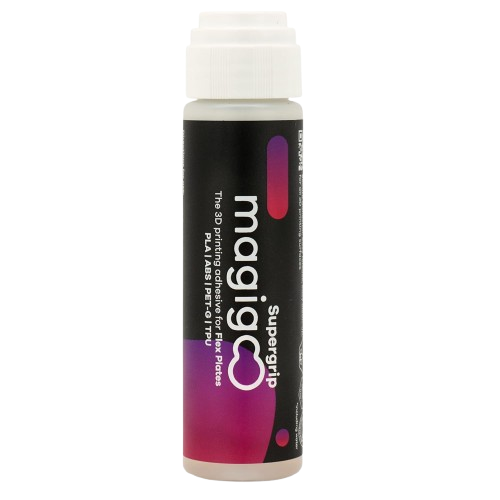
TEQStone Bed Adhesive
~$18Bed adhesion solution, better than a plain glue stick for PETG and engineering materials. Grips warp-prone corners while hot and releases cleanly once the plate cools. Works on any plate size.
Amazon →Will it fit your printer?
| Printer | Build area | BIQU PyroGrip 257×257 | UniTak3D 257×257 |
|---|---|---|---|
| P1P, P1S, P2S | 256 × 256 mm | Fits | Fits |
| X1C, X1E, X2D | 256 × 256 mm | Fits | Fits |
| A1 | 256 × 256 mm | Listing targets P/X series; size matches, check the listing | Fits (A1 listed by manufacturer) |
| A1 Mini | 180 × 180 mm | Too large, does not fit | Too large, does not fit |
| A2L | 330 × 320 mm | Too small, does not fit | Too small, does not fit |
| H2S, H2D, H2D Pro, H2C | 305–350 × 320 mm | Too small, does not fit | Too small, does not fit |
A1 Mini, A2L, and H-series owners: stick with Bambu's own plates for now; the third-party selection in those sizes is thin. The TEQStone adhesive above works regardless of plate size. Full printer specs in our comparison tool.
Textured vs smooth PEI: which surface when
Textured PEI: the default
Textured PEI is the workhorse surface and handles the widest range of materials: PLA, PETG, ABS, ASA, and TPU, with ABS/ASA gripping well at 90–100°C bed temperature. PLA needs no glue on a clean textured plate. The texture leaves a matte, slightly grainy bottom surface, which most people prefer for functional parts because it hides first-layer imperfections.
Longevity bonus: when a textured plate glazes over from repeated printing, light sanding with 400-grit wet/dry paper restores the texture. Smooth plates are harder to restore and typically need replacement once worn.
Smooth PEI: for glossy bottoms
Smooth PEI gives a flat, glossy bottom finish, the better choice for display pieces where the bottom face is visible. The trade-off is upkeep: fingerprint oils kill adhesion faster on smooth surfaces, and deep scratches cannot be repaired.
One critical rule: never print PETG on smooth PEI without glue. PETG bonds so aggressively to bare PEI that it can tear chunks of the coating off when you remove the print. A thin glue layer acts as a release agent, not an adhesive. This is the main reason the double-sided UniTak3D plate makes sense: textured side for everyday PETG and functional prints, smooth side for PLA display pieces.
Whichever surface you choose: keep it clean
A dirty plate causes more adhesion failures than any plate choice. Wipe with 90%+ IPA before printing (not 70%, which leaves residue), wash weekly with warm water and dish soap, and only touch the plate by its edges. Full routine in our build plate maintenance guide.
When you actually need glue
Glue on a Bambu plate serves two opposite purposes, and knowing which one you need matters:
- As a release agent: PETG on PEI. PETG over-bonds to PEI, especially smooth PEI. A thin, even glue layer lets the print release cleanly instead of ripping the coating. Let the plate cool fully; PETG releases on its own at room temperature.
- As an adhesion promoter: engineering materials. Nylon (PA) and PC do not stick well to PEI. Use glue on the Engineering Plate, and add a brim; for Nylon a brim is almost always necessary.
- Against warping corners: ABS and ASA. A dab on warp-prone corners holds them down while hot and releases once cool. Combine with a closed enclosure and a 5–8 mm brim; our warping guide walks through the full fix order.
What you do not need glue for: PLA on a clean textured PEI plate. If PLA is not sticking, the plate is dirty or worn; clean it first. See first layer problems if cleaning does not solve it.
| Material | Textured PEI | Smooth PEI / Cool Plate |
|---|---|---|
| PLA | No glue needed | Glue recommended |
| PETG | Glue optional (as release agent) | Glue required (release agent) |
| ABS / ASA | Good at 90–100°C, glue on corners if warping | Glue required |
| TPU | No glue needed | No glue needed |
| PA / PC | Not recommended; use Engineering Plate with glue | Not recommended |
Plates are consumables
Every plate loses adhesion after hundreds of print hours. If adhesion consistently fails despite cleaning, the PEI coating is delaminating, or the texture has worn smooth, replace the plate rather than fighting it.
Related reading
- Build plate care and cleaning: the daily and weekly routine that keeps adhesion consistent
- Fix warping and bed adhesion: step-by-step troubleshooting when corners lift
- First layer problems: diagnosis when nothing sticks
- Materials guide: bed temperatures and plate requirements per material
- All recommended accessories: plates, dryers, tools, and upgrades in one place