Belt Tension & Adjustment
Keep your motion system precise.
How tight should the belts be?
There is no frequency target to hit. During calibration the printer runs a frequency sweep and warns you when a belt is loose (HMS 0300-1000-0002-0001 for X, 0300-1100-0002-0001 for Y; the A1 shows a prompt). Then retension as below and run Vibration Compensation again.
- Title
- Bambu Lab Belt Tension and Adjustment Guide
- Section
- Guides
- Last updated
- Page
- Status
- Not affiliated with Bambu Lab
How to check belt tension
Your printer checks the belts itself: the calibration runs a frequency sweep and warns you when a belt is loose.
| Printer | Where to find it |
|---|---|
| X1C | Settings → Print Calibration → Vibration Compensation (older firmware: Control → Calibrate) |
| P1S / P1P | Settings → Calibration |
| A1 / A1 mini | Settings → Maintenance → Calibration |
| P2S / X2D / H2 series | Settings → Calibration → Print Calibration |
How to adjust: X1C / P1S / P1P / P2S / H2 series
- Power off the printer (P2S: also remove the top glass cover)
- Loosen the four belt-tensioner screws at the back 1–2 turns; do not remove them
- Move the toolhead back and forth several times, also along Y (P2S: as wide as possible, 3–5 times); X1, P1 and H2: finish at the rear end
- Retighten the four screws without over-torquing; the springs set the tension
- Power on and run Vibration Compensation
How to adjust: A1
- Raise the X gantry to mid height and power off
- X belt: loosen the screw on the back of the toolhead one turn (H2.0), move the toolhead along X three times, retighten
- Y belt: remove the small cap at the front of the base, loosen both screws one turn, move the bed back and forth three times, retighten
- Z belt: loosen the two screws near the right column one turn, home, move Z up and down once, retighten
- Power on and run Vibration Compensation from Settings → Maintenance → Calibration
A1 mini: follow Bambu's A1 mini belt tensioning guide.
Manual check without the printer test
Pluck the belt like a guitar string:
- Dull thud: Too loose. Tighten.
- Low twang (bass note): Good.
- High ping: Too tight. Loosen.
Community rule of thumb, not from Bambu's documentation. Use the built-in check when possible.
When to replace belts entirely
- Visible cracking, fraying, or missing teeth
- Belt has been significantly over-tensioned (stretched/delaminated)
- Tension keeps dropping between checks (belt has stretched past recovery)
Belts are a consumable: replace them when they are broken or worn. Bambu sells model-specific XY belts (P2S: 1444 mm long, 7 mm wide; H2D: 1824 mm, 9 mm wide; H2S: 1836 mm, 9 mm wide), so order the one made for your printer.
Too loose vs too tight: symptoms
| Too loose | Too tight |
|---|---|
| Layer shifting | Bearing wear |
| Dimensional errors | Motor strain |
| Ringing/ghosting | Excessive ringing |
| Inconsistent prints | Premature belt wear |
Tools for this job
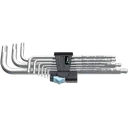
Wera Hex-Plus L-Key Set
The only tool this job needs: quality hex keys that loosen and re-torque the tensioner and motor mount screws without stripping them.
Affiliate link. We may earn a small commission at no extra cost to you.